What is GrayLog?
GrayLog is a fairly agnostic log collection service that’s built off the Elk search framework. It essentially allows for the collection of logs from many different systems into what ware called “streams”, which then allows for filtering, reports, and the like. It also supports modules and content packs to help make it very extensible.
It supports a lot of features [1] including some such as:
- The ability to use Beats [2]
- The ability to have multiple streams, for different purposes, and with different formats
- JSON with web api
- Syslog with TCP/UDP
- Raw/Plaintext
- The ability to extract information from a stream, or to change the data coming in (e.g. regex replace). This includes the ability to create new columns to capture specific information that one wants.
- The ability to create reports, dashboards, and the like.
- The ability to send emails on specific conditions [3]
- (Among, many, many other features)
Why use it?
One issue with systems administration is the ability to track issues that happen on systems. This matters because the only way to deal with security is to detect when something happens, and to respond effectively. Logs are often created, but if you have to visit individual machines to gather/review logs, it’ll be difficult to keep up at scale. Even without the scale aspect, logs usually take effort to get to, and that’s of course, part of the problem.
Using a log collection service allows logs to ship to another system, where there’s one entry point to review the logs. Along with the convenience of one place to look, this also helps with security. One thing that happens with pen testing and compromising of systems is the disabling or wiping of logs. If these are shipped to another server, and that’s yet to be compromised, one can see the logs with greater confidence that these are the true logs.
This of course assumes proper configuration and setup.
How to use it (Server)?
Docker Setup
There are a few ways of setting this up. For the Enterprise, a VM install and/or a dedicated server is likely more appropriate. For me, I decided to go with a Docker [4] setup. The advantage of Docker is that it’s easier to setup, takes less resources than a VM, and in my opinion, works just as well. The instance is incredibly performant, and can likely run well on even lower end hardware. For myself, I decided to install this on my Synology in Docker (along with a bunch of other services).
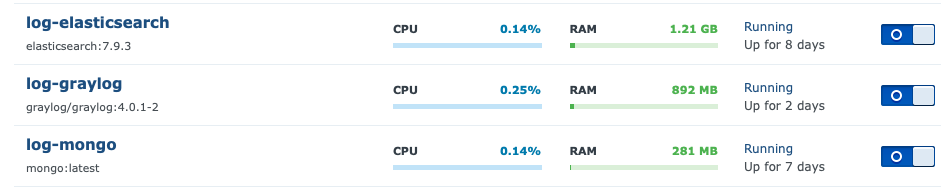
There are three parts that are needed:
- Elastic Search [6] - Used as the search engine
- MongoDb [5] - Used as the document store
- GrayLog [4] - Used as the front line interface
The way I set this up is that I don’t allow external access to anything but GrayLog, and setup links for the other instances. Furthermore, I have them linked to the same general folder (in my case docker/graylog/*). I also prefix my docker names with their purpose. Some other docker instances are more generic, but not these.

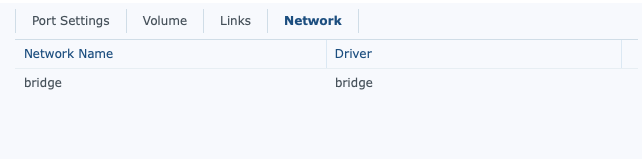
From a security standpoint, it’s pretty important, that unless properly secured, related docker images that don’t need external access aren’t given external access. In the case of Mongo, below, is an example of my network setup. Ideally, this would be on their own network, but given the links being setup, this isn’t an issue for security.
Once the base docker instances are setup, the port settings are the next important thing. You need to have, at least, two ports opened up. One is for the web interface. The container, internally, listens on port 9000/tcp. You need to allow this. The second one is for the collection agent. Depending on the agent used, this may need to be TCP, or may need to UDP. Personally, I used TCP for beats, and set that up too.
Another thing worth mentioning about the Graylog docker setup is their own internal security. There are 2 very important environmental variables that need to be setup.
- GRAYLOG_HTTP_EXTERNAL_URI - The domain it is listening on. This is good for the reverse proxy (discussed a bit later)
- GRAYLOG_ROOT_PASSWORD_SHA2 - This is an SHA2 hash of the desired root password. You can make other users after, but it’s good to setup this one as a very secure password.
- GRAYLOG_PASSWORD_SECRET - The salt for future password generation
There’s a good amount of documentation in their documentation [7]. Be sure to read the echo -n yourpassword | shasum -a 256 portion specifically.
After all this, it’s a good idea to lock down the Synology. By default, it lets everything in, if it doesn’t match a rule. Better is to accept just your listener (for beats), and that’s it. It’s a better idea to use a reverse proxy and lock everything behind SSL. How to do this is largely outside the scope of this specific article, but for Synology look at the “Application Portal” under “Control Panel”. The tab “Reverse Proxy” is one’s friend. I’ll write an article on properly setting up a reverse proxy in the future.
Once all this is done, launch the containers. You may get an error, like I did, about missing configuration files. If you do…
Configuration
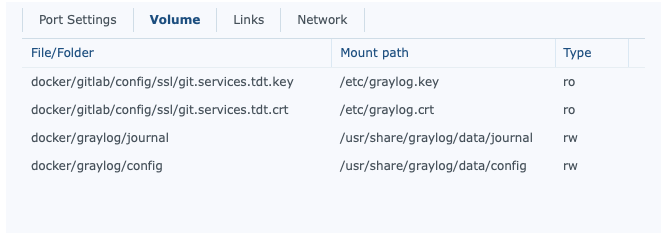
Setting up the configuration is pretty easy. First, it’s important to have a link within your GrayLog docker instance to a config directory.
Then, download the configuration files from their Github repo. You’ll need graylog.conf and log4j2.xml. You can find the repo at: https://github.com/Graylog2/graylog-docker/tree/4.0/config. Copy these both into the config directory setup. There are a few very useful lines to look for:
- root_timezone : This is the time zone that you live in. By default it uses UTC, which can be confusing to have to translate. The contents of the logs are still kept in UTC, but your interactions would be in your own timezone.
- http_bind_address : The default is 127.0.0.1:9000, and this is an issue with docker. Set this to 0.0.0.0:9000
- trusted_proxies : This is a list of IPs that can be used for the reverse proxy
- elasticsearch_hosts : The URL for contacting the elastic search engine. This uses the same name as the link defined previously. For example, mine is
http://elasticsearch:9200 - transport_email_* : This is the SMTP server for sending logs if needed.
- transport_email_web_interface : This is the domain name of the instance, if using a reverse proxy. This is so the emails have the proper URL when sending logs.
The others I largely left default, and modified within the interface. Some useful things to modify are the number of shards, how large they should be, and the rotation strategy. I expanded the number of shards, so I can keep logs for a longer period of time, but largely left the rest alone.
How to use it (Beats)?
When I first set this up, I was using syslog, and sending logs that way. I found it to be fairly limiting for a few reasons:
- I had to open up a separate stream and corresponding port for every machine. After 10 or so individual setups, I decided against this.
- I couldn’t properly send Windows logs. So it worked fine on my linux/osx systems, but not for windows.
So…enter Beats [2] - a fantastic utility for sending logs. It’s separated into two main modules:
- winlogbeat [8] - for sending Windows event logs (security, application, etc)
- filebeat [9] - for sending file-based log messages
These are very easy to configure, and a bit outside the scope of this topic. The short version is that if you’re dealing with linux/unix/osx, use filebeat and configure it to log “system”. For Windows, you can use a combination of winlogbeat and filebeat, depending on your needs. For me, on my SQL Server I use both. winlogbeat will deal with the event viewer, whereas filebeat will deal with my SQL Server log files. I may do an article on beats, and how I have it configured, in a future topic.
The important part in this is that you will need to edit the config file itself and configure it for logstash sending, and point it to the open tcp port you left open for Beats communication. You should modify/edit the stream in the interface first before setting up beats
How to use it (Interface)
Beats, out of the box, is definitely not useful or interesting. To get started with use, there’s some more configuration that’s needed. First, log into your instance that was setup. Remember the SHA password generated before. The user is admin, the password is the one you generated.
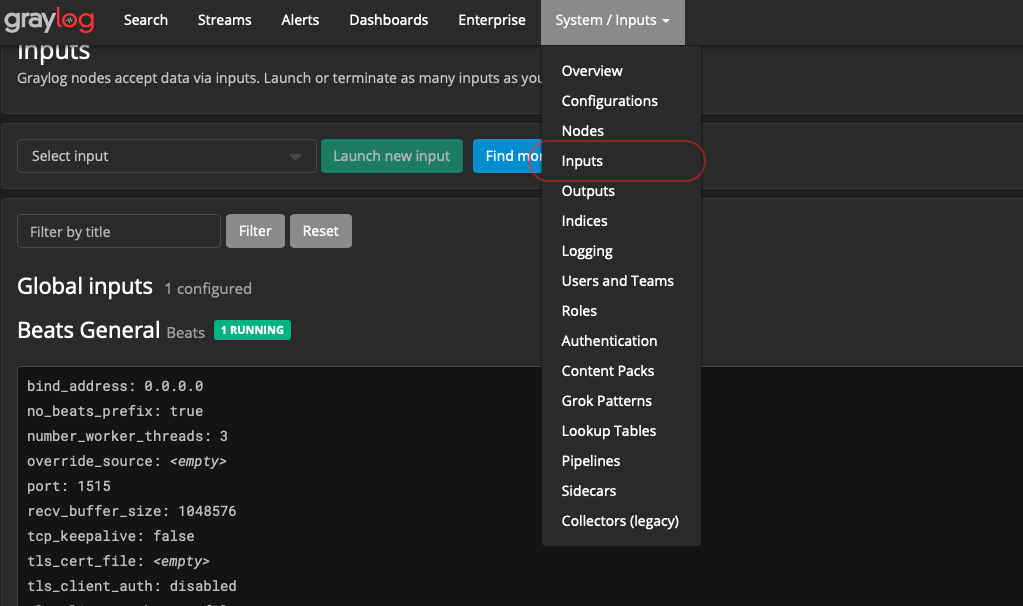
Setting up an Input
To setup an input, look to the right of the menu bar that’s labeled “System/Inputs” and select “Inputs”
Once there, create a new Beats input. You should be presented with something like the following:

The most important elements here are the ones in red.
- Title: The name of the input.
- Bind Address: What IP to bind to. If Docker, this is fine to keep at 0.0.0.0, which is listening to all interfaces
- Port: This is the port opened up in Synology for this interface
- No. of worker threads: This is good to increase a bit, if you’re using beats for everything. I set mine to 3 worker threads to keep things quick.
Another useful section in this screen is the “Manage extractors”. That’s outside the scope of this topic, but can be useful to split input to make things easier to filter later on. One awesome feature is the ability to create your own fields.
Creating some filters
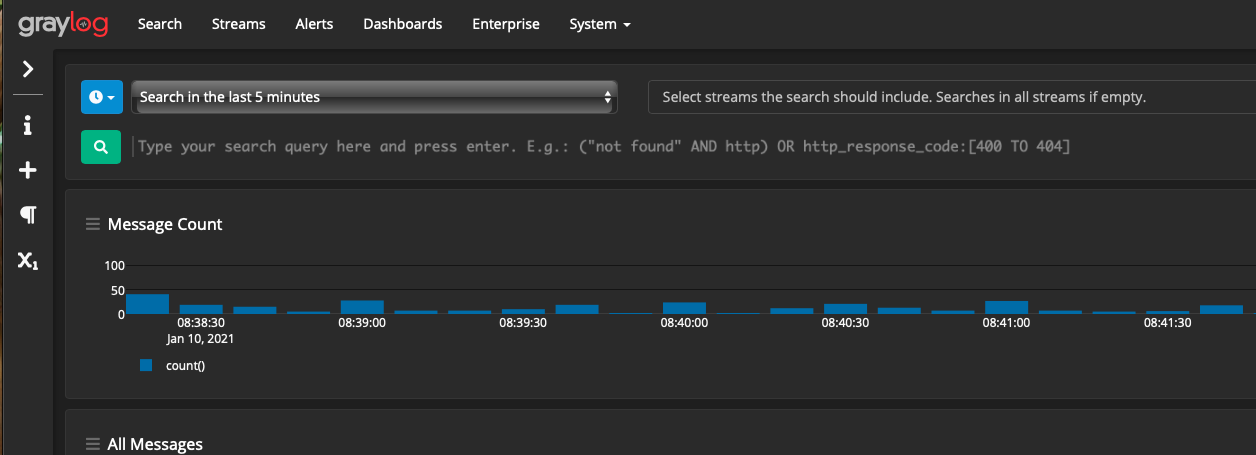
When there’s a lot of messages coming in, filtering becomes incredibly important. An example query is the following:
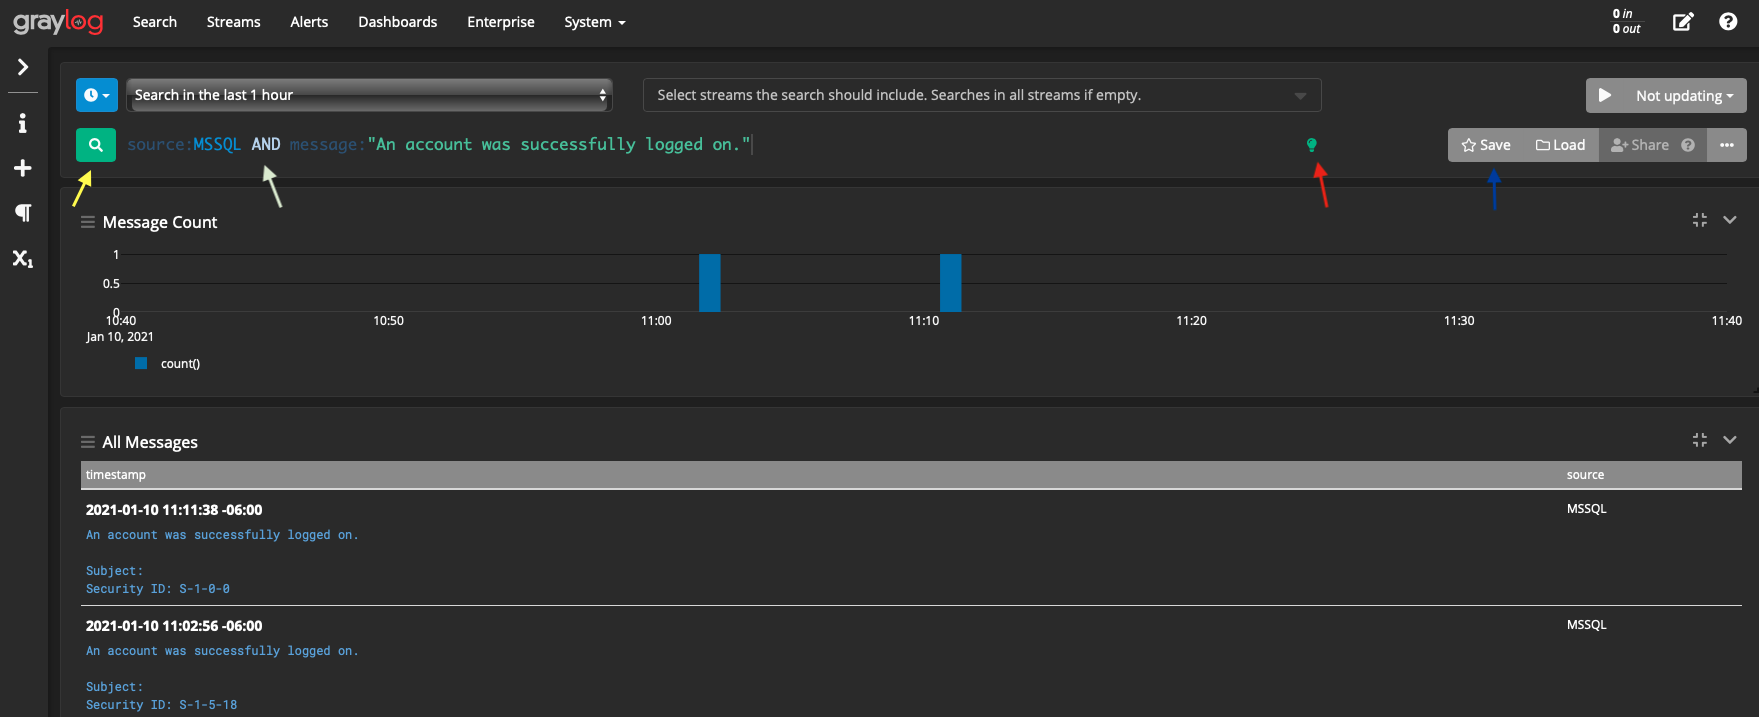
- Yellow Arrow: This is the search button, hitting enter will also search
- White Arrow: This is the query itself. Note that to create compounded searches, the AND is capitalized. In this case we’re searching for where the source is equal to “MSSQL and the message is “An account was successfully logged on.”. You can also use regex here, or even a simple phrase (e.g. just “An account was successfully logged on”) to default search the message.
- Red Arrow: This is a link to their search documentation [10]
- Blue Arrow: You can save/load previous queries.
Another useful feature is to, by point and click, to build a query. An example is below, where the first operation being in the red. You expand out a particular query of interest, and click the little arrow that shows up which pops up a menu where you can “Add to query”.

What’s useful about this is that some streams come in with special characters. One way to deal with it is to manage the extractors or change the way they’re sent, but this is particularly annoying with MSSQL. This allows you to get an idea of what’s needed to generate a successful query.
Creating some dashboards
Dashboards are a culmination of filters that can have multiple search elements on a single page. I’ve only barely touched the surface of dashboards, but I find them useful. To get to these, in the upper bar select “Dashboards”. There’s one default dashboard given, and that’s for “Sources”. This is a very useful dashboard to look at because it gives a good example of how to do more advanced widgets.
Dashboards can encompass groupings of functionality, with tabs splitting up their purpose. One example I have is my SQL Server monitoring (which will be covered far greater in a future post). In this dashboard, I have 2 tabs - one for backups, and one for logins. Each tab has a similar structure associated with it. That being, a failed backup/login, and a successful backup/login with a table at the bottom that shows the failed operations.

In the above example, the labels are:
- Blue arrow : The ability to run this query, it’ll run that same filter as a search query. This is good for getting more context to the number being presented
- Red arrow : The context menu for modifying the widget (including the query)
It’s worth noting that the top query (like a normal search query) applies to all widgets, but individual widgets can define their own query.
Ideally this should be paired with extractors to make the queries a lot easier.
Closing Notes
I hope this article shows how useful GrayLog can be for log monitoring when dealing with multiple systems. It’s incredibly powerful, with lots of features - even in the free version. The plugins can make it even more powerful. One very useful plugin, that I can’t use, is the Active Directory Auditing plugin [11].
One thing I plan to get into is their API functionality. Personally, I’d like to develop a widget for xwiki (what I use for my own documentation + home page for browsers) to pull in some of the more important events from GrayLog. Also, I’d like to get email alerting on some stuff (e.g. a daily summary when database backups fail).
As I wrote this, I think there’s a good opportunity to discuss Beats in further detail, and how I’m logging MSSQL. Those will be upcoming posts.
References
- 1: https://www.graylog.org/products/enterprise
- 2: https://www.elastic.co/beats/
- 3: https://docs.graylog.org/en/3.0/pages/streams/alerts.html
- 4: https://hub.docker.com/r/graylog/graylog
- 5: Mongo on DockerHub
- 6: ElasticSearch on DockerHub
- 7: https://docs.graylog.org/en/2.0/pages/installation/docker.html#settings
- 8: https://www.elastic.co/downloads/beats/winlogbeat
- 9: https://www.elastic.co/beats/filebeat
- 10: https://docs.graylog.org/en/4.0/pages/queries.html
- 11: https://marketplace.graylog.org/addons/c537bce0-29df-4a40-aa04-22432363f7de